Wurmple Fursuit Build Log
Back in 2020, I made a Nargacuga fursuit head so I could learn how to work with upholstery foam. It looked… bad. The inside was a horrible mess. Fast forward to 2023, I went to a 3-day convention, wore a bunch of different heavy wigs the whole time, got a rash on my forehead, sweated the whole time through many layers of clothes. I thought, fuck it, I am a grown ass adult and I’m gonna finally live out my dream and make a Pokémon fursuit. There was a furmeet coming up, and people there will literally share my big fuzzy costume interests. Surely it would be fun! (It was.)
Of course, in true shitpost fashion, my perfect fursuit candidate had 10 legs and is shaped like a sausage.

Part 1: The Worm
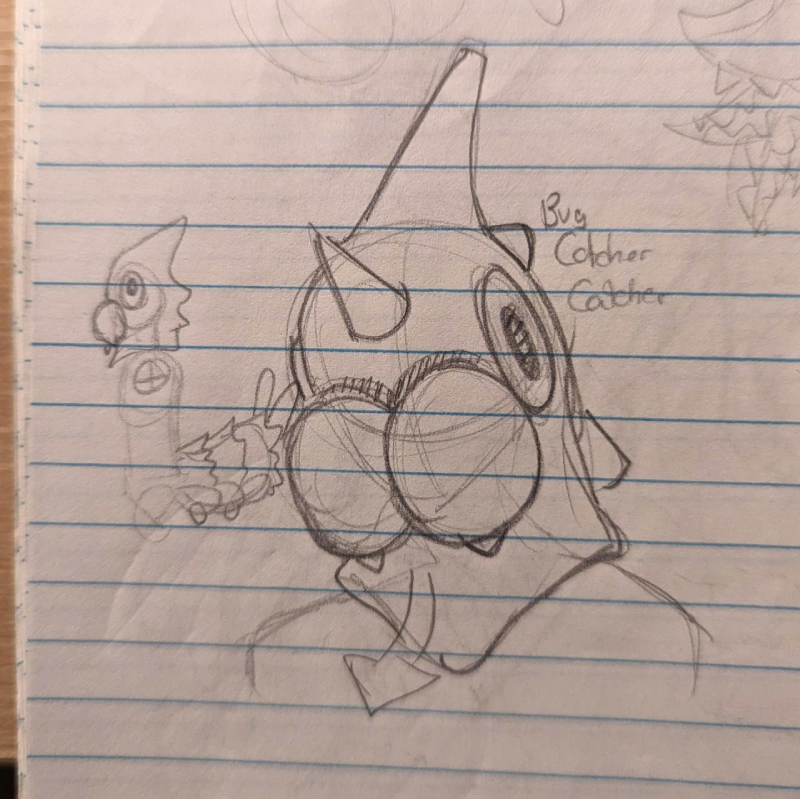
Wurmple started as a dumb little sketch in the corner of my notebook. I have a lot of cosplays and plushes under my belt but the last fursuit (head) kinda looked like it would belong in a bootleg Freddy Fazbear establishment, so I brainstormed over a bunch of Pokémon I like that would work as a partial and are simple enough in design to avoid accidentally creating Uncle Uncanny 2.0. The goal was something that would be relatively comfortable and easy to bring to events ‘cause I was not mentally prepared to drag a suitcase in public transport and wear a full body sweat carpet yet. I ended up doodling a few ideas like Haunter or Koffing, but then I pictured a Bug Catcher trainer with a bug head and I thought it was funny as hell, so the choice was made.
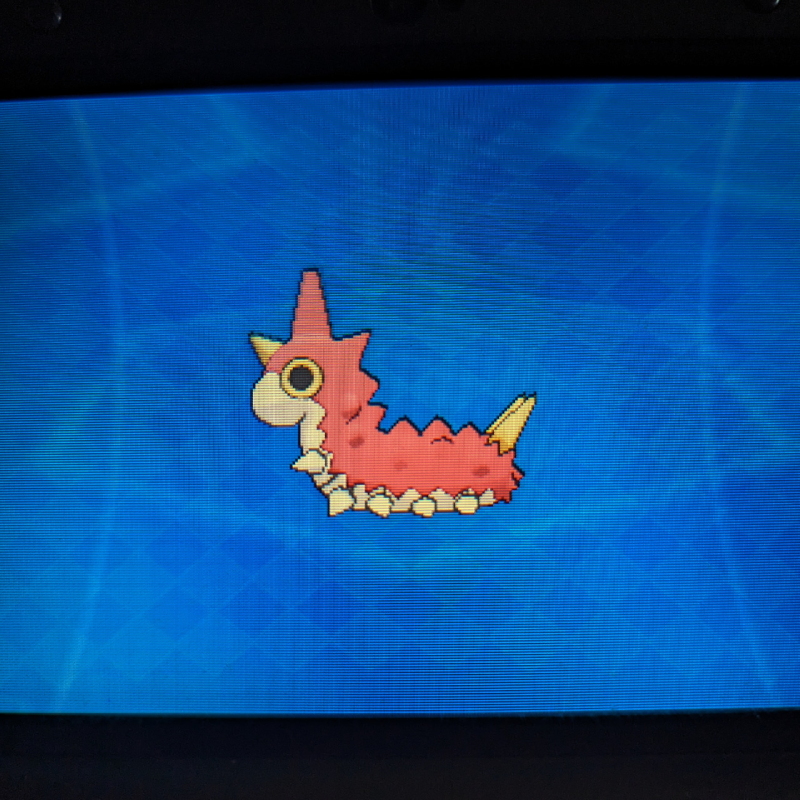
I picked up my copy of Alpha Sapphire to get a good look at the model and immediately ran into a problem; the eyes on Wurmple are literally on the side of the head. They sit so flush you literally cannot see them if you look at them from the front. Not a great start. I figured I could probably hide a small hole for vision right above the mandibles where the red and cream colors separate. I wasn’t super confident it would work, but dammit, I was already commited to being a stupid Bug-Bug Catcher.
Similarly, I looked at the side profile and figured I could open a hole behind the mandibles at mouth height to breathe out of. With a disproportionate amount of confidence for the bullshit I was about to summon into the world, I began the project by patterning out the tail.
Part 2: The Bug Ass
I’ll be honest, I started on the tail so I wouldn’t have a chance to back out of the project if the head ended up being a hot mess. I’ve patterned out and sewn a few plushes before, so making a big ol’ headless grub sounded like a reasonable goal.
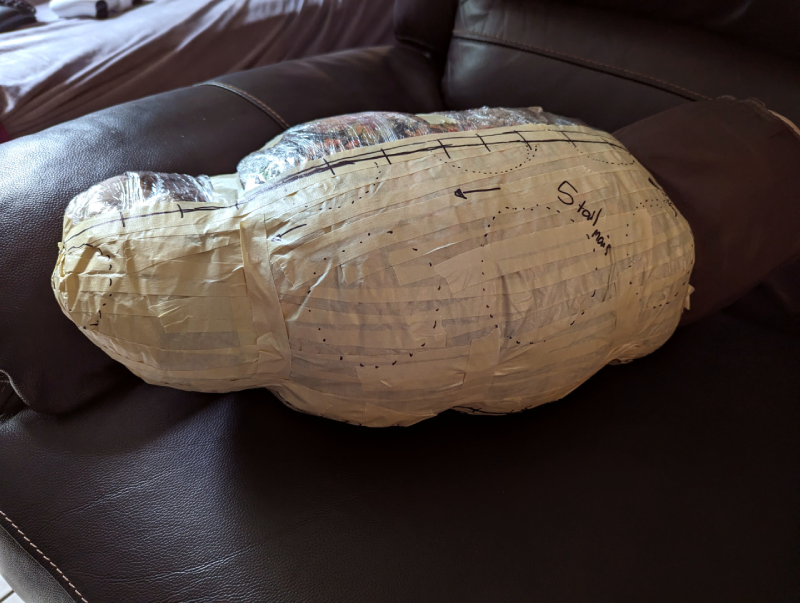
I usually make plush patterns by building out the shape with newspaper and tape, but Wurmple’s tail was pretty big when scaled to fit a human, so I searched for alternatives. I ended up building the base shape to draw a pattern out of by taping two pillows together. I tied down small sections to shape the belly sectiond and slapped a layer of masking tape over half of it to trace my pattern. Once everything looked good, I cut the pattern pieces out and laid them flat. The pillows were returned to the couch safely once they recovered from this barbaric treatment.
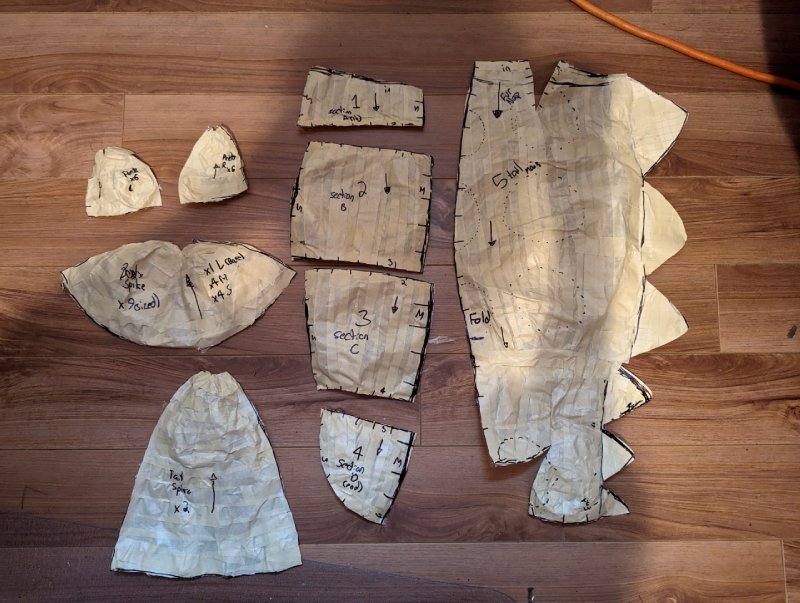
I dug through my materials storage (a sad lonely plastic bin) for some Trash Fabric leftovers from other Trash Projects and tested the pattern out to see how it looked. I made the pattern for the spikes and legs at that point based on the test build and adjusted some seams on the tape pattern to refine some shapes, but overall the first pattern was a great success!

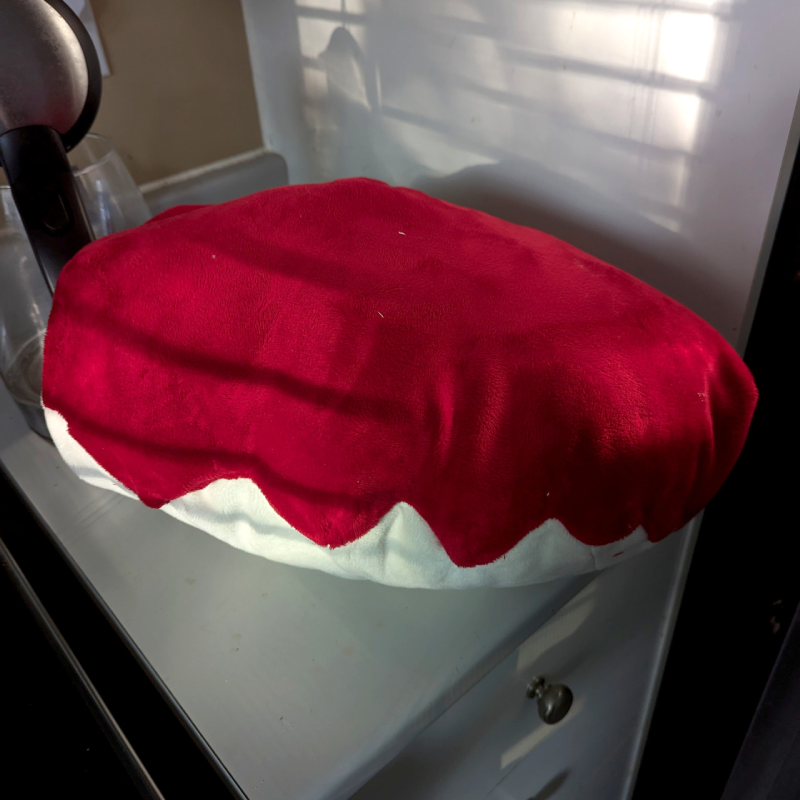
With the mockup done, I pulled out the minky fabric and got to sewing the tail together. I picked minky for the project 'cause it felt right for the cartoony 3d models to have that smooth short-pile look in real life (kinda like the official mascots, really). I was aware the margin for error when your fur pile is 3mm long is basically non-existent, but hey, at least I could work with just a dust mask instead of the entire safety gear kit!
Sewing the main shape of the tail was pretty straightforward; I assembled the belly panels together, stitched the darts on the red parts to form the curve, and attached the backside of the zigzag spikes to it. I assembled the top and bottom halves together, tacked each zigzag down in place by hand, and filled the whole thing with polyester stuffing and witnessed my beautiful bug sausage take shape.
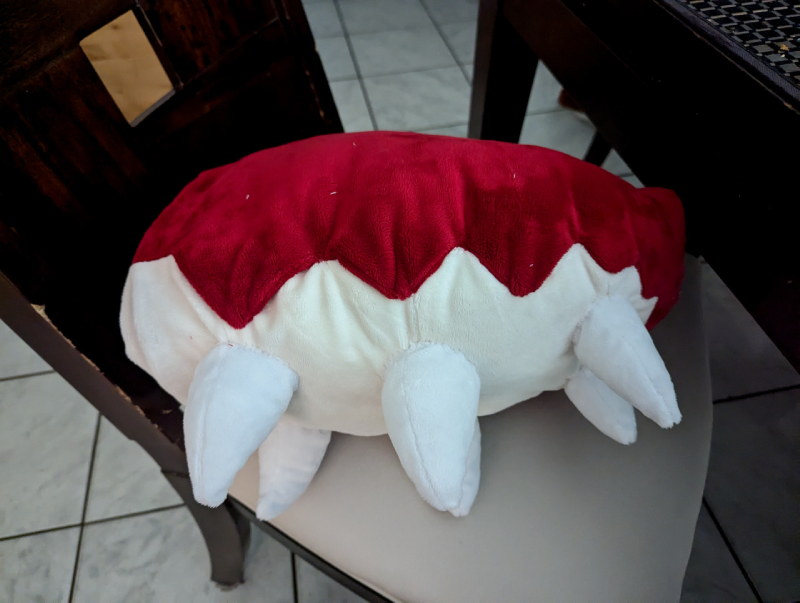
Once I was sure it everything looked good. I stitched six little white legs and attached them onto the belly by hand using the belly seams as a guide.
Before moving on to the top spikes, I took a break from handsewing to build the tail base. It’s a little nub made out of sandwiched upholstery foam with a belt running through a channel carved into the foam. It’s topped off with a layer of high density EVA Foam glued at the base to keep the anchor point sturdy. Huge thanks to Neffertity for her tail tutorials as this was the main inspiration behind the method I used for the tail attachment. The foam nub goes about a quarter of the way through the tail, with the rest of it being filled up with the polyester stuffing.
Once the tail attachment point was secured, I started sewing all the spikes for the top half of the tail, stuffed them, and then stitched each of them to the tail by hand. Once they were all stitched on securely, I sewed the back closed with one last minky piece and Wurmple’s tail was complete!
(Looking back, I could probably have machine stitched the legs and spikes on… But I was watching some really good Resident Evil Randomizer streams while handsewing these, so I didn’t wanna get off the couch to work on the pattern again)

I’m so glad I started with the tail. It was basically a big plush, and I was so proud of the results when I was done that I was energized to start working on the head.
Oh right, the stupid worm head with no vision.
Part 3: The Head
Building up the shape of Wurmple’s head was simple enough. I began by building a bucket head base out of upholstery foam by following Skyehigh’s Studios old tutorial (new one linked here) and slapped some paper on it to figure out the size of the mandibles and the eyes. I immediately regretted following the tutorial steps for the eye holes, since I Forgot We Weren’t Gonna Be Doing That on Wurmple, and mark where my cyclops eyehole is generally going to be instead.
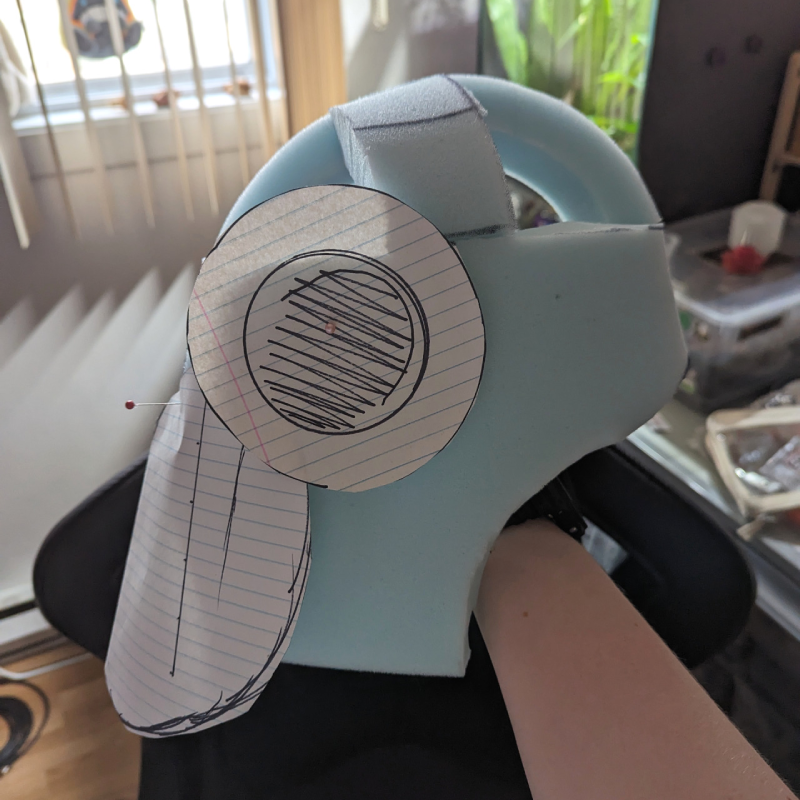
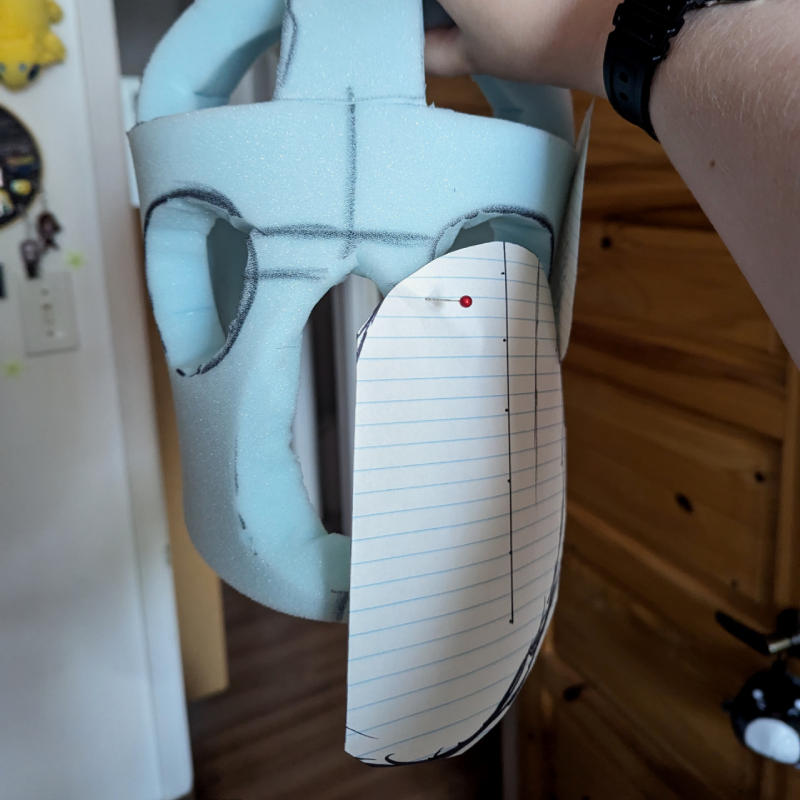
Once I was satisfied with my patterns, I cut some more upholstery foam slabs, carved them with scissors until I got down to the general shape of the mandibles and horns, and glued them onto the base. I immediately got another stress injury carving everything down and realized I did not learn from my wig ventilating mistakes during Warden Ingo's build. I took a break to add a turkey carver to my online shopping bookmarks, which I immediately forgot about and still haven't bought as of re-editing this guide in 2025.
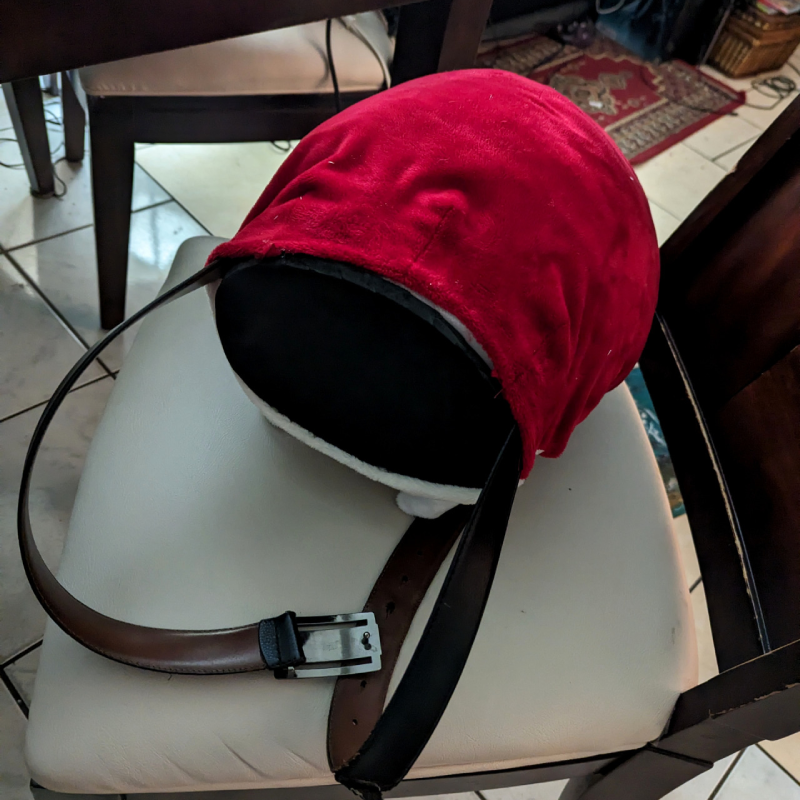
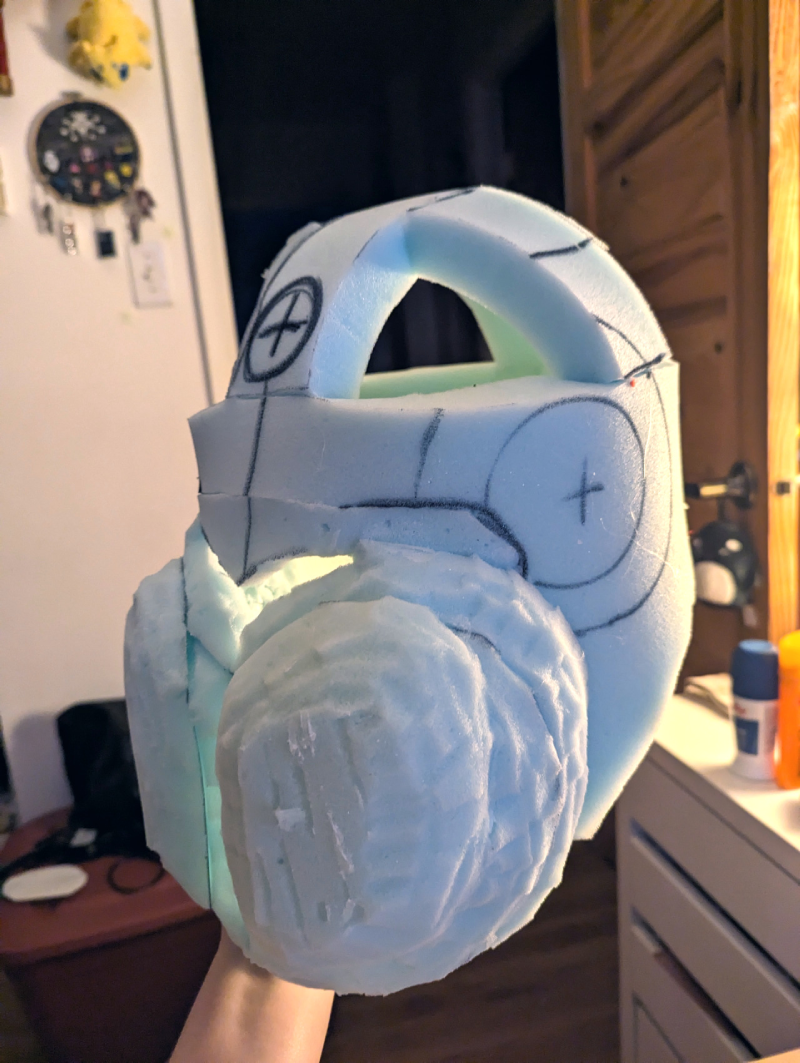
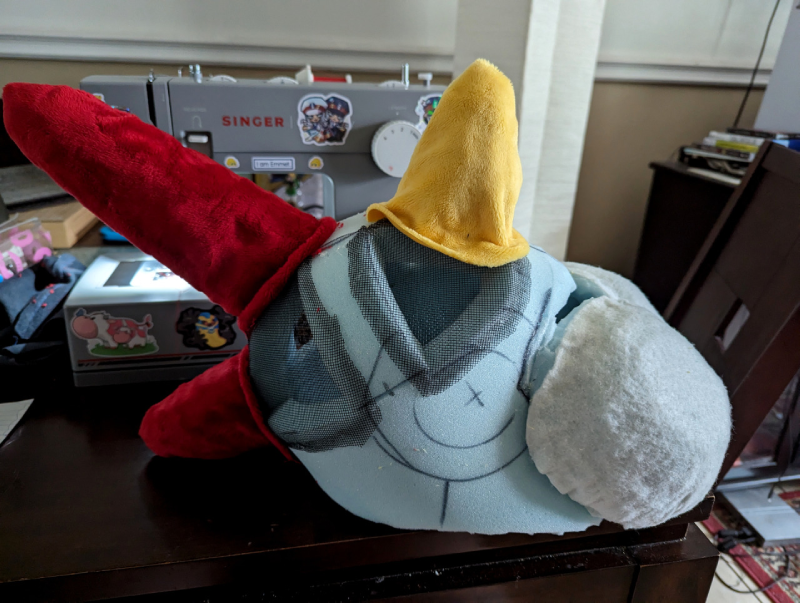
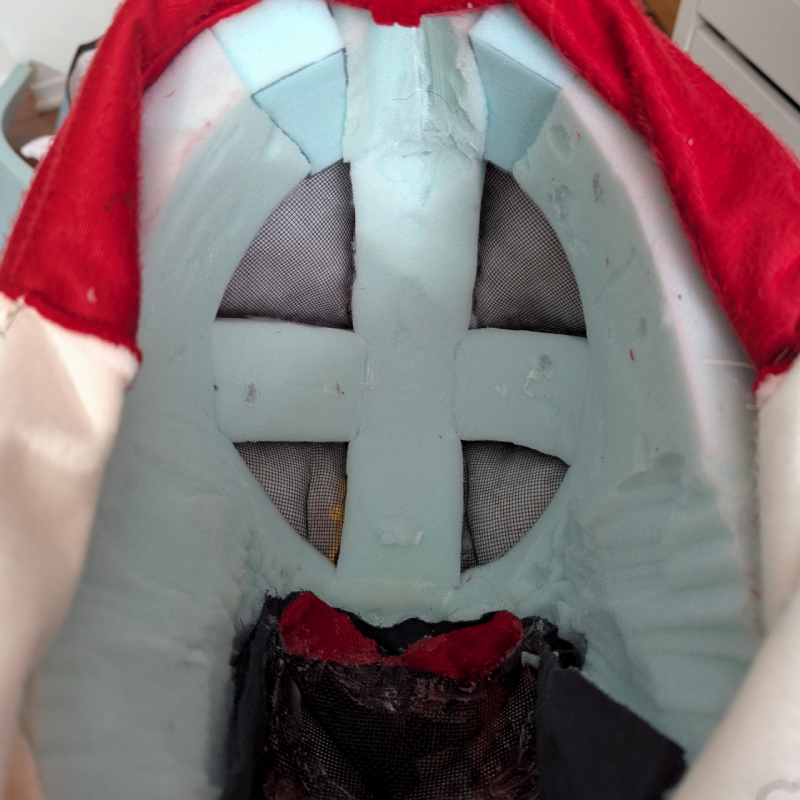
Since I was using minky for this project, I needed to make sure my base was as smooth as possible. The fabric is so thin it would pick up every wrinkle ever if I wasn't careful. I dug into the bin for some Trash Felt and glued it over the mandibles to smooth things out and added some mesh to the holes of the bucket head base to keep the curved shape of the head going without sacrificing those sweet ventilation holes.
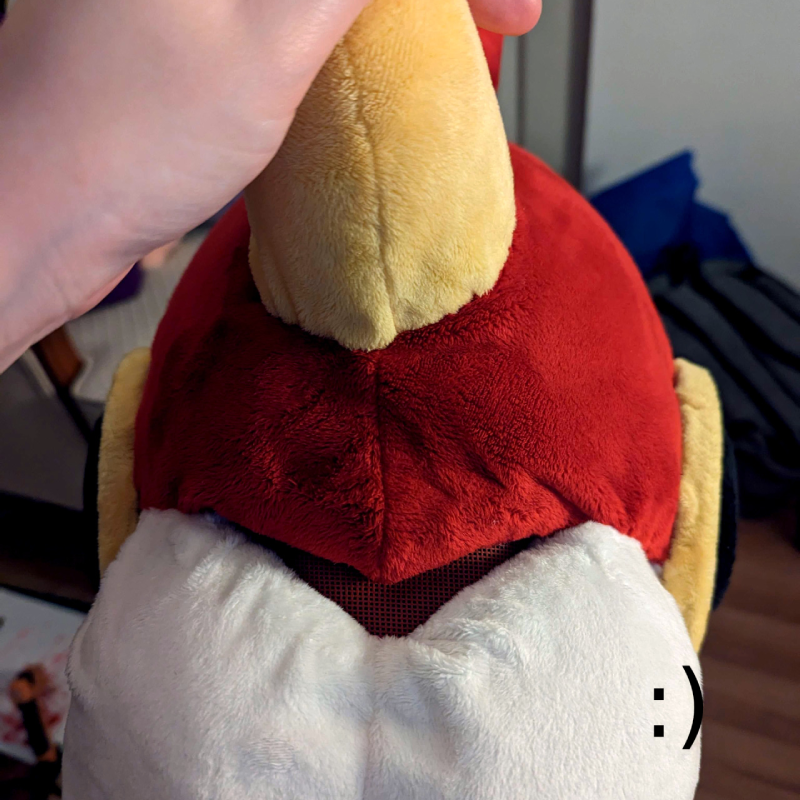
I also added my vision hole and marveled at my horrifying Mando helmet abomination. At that point in time I’m was having some big doubts about the vision hole, but I trudged on because I’m not just gonna wear a bug ass to this furmeet.
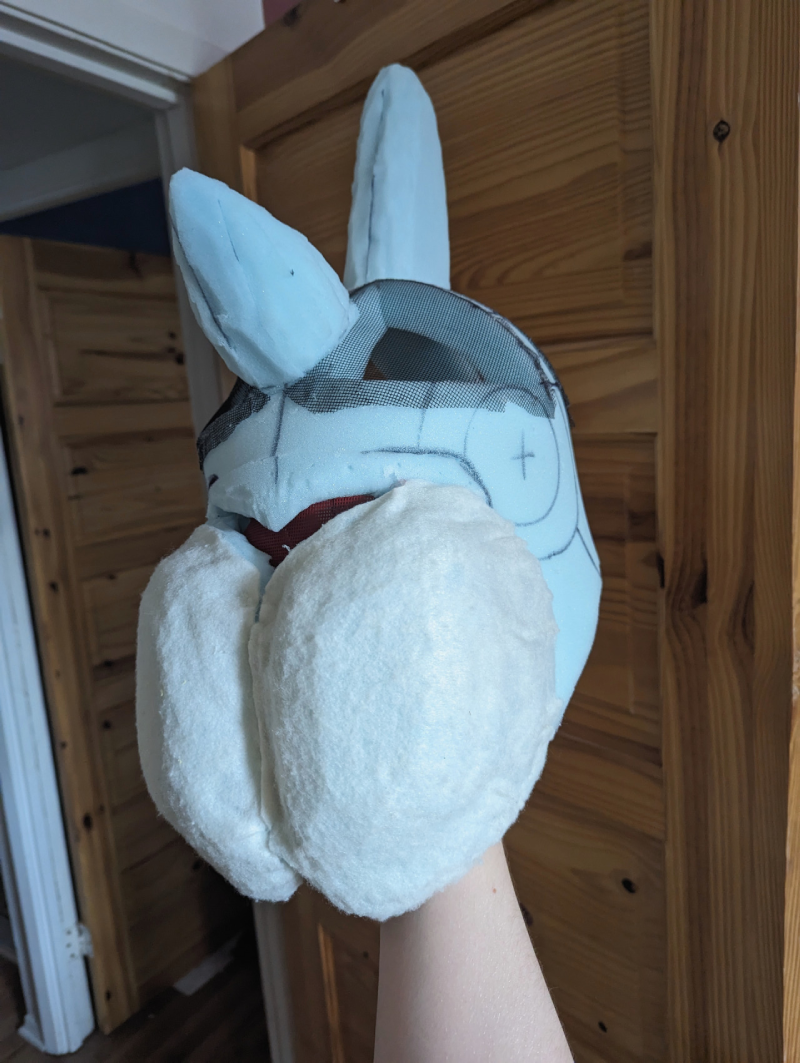
With the base complete, I covered the whole thing in tape and drew over it like I did with the tail to create a pattern, made sure to forget to take pictures of said pattern so that this step is lost to time, and started sewing the head fabric so I could slap some skin on this bad boy, starting with the horns. At the same time, I stitched the darts on the mandibles, pinned that to the head for later, and assembled the red halves of the head together on the back seam to test the fit.
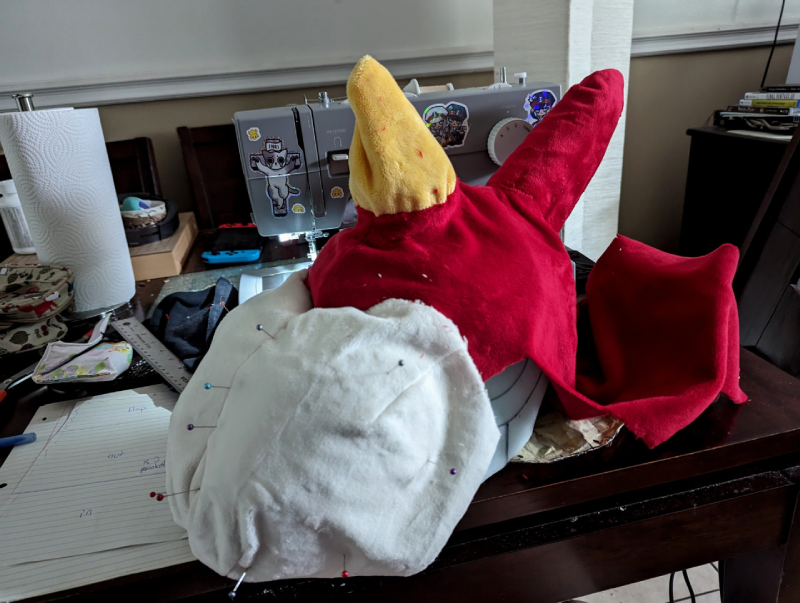
With the test fit successful, I pulled the red part off in order to machine stitch it to the front half of the head along the zigzag edge and slipped the whole thing over the head again. With everything in place, I painstakingly handstitched everything up, including the side of the mandibles and the horns.

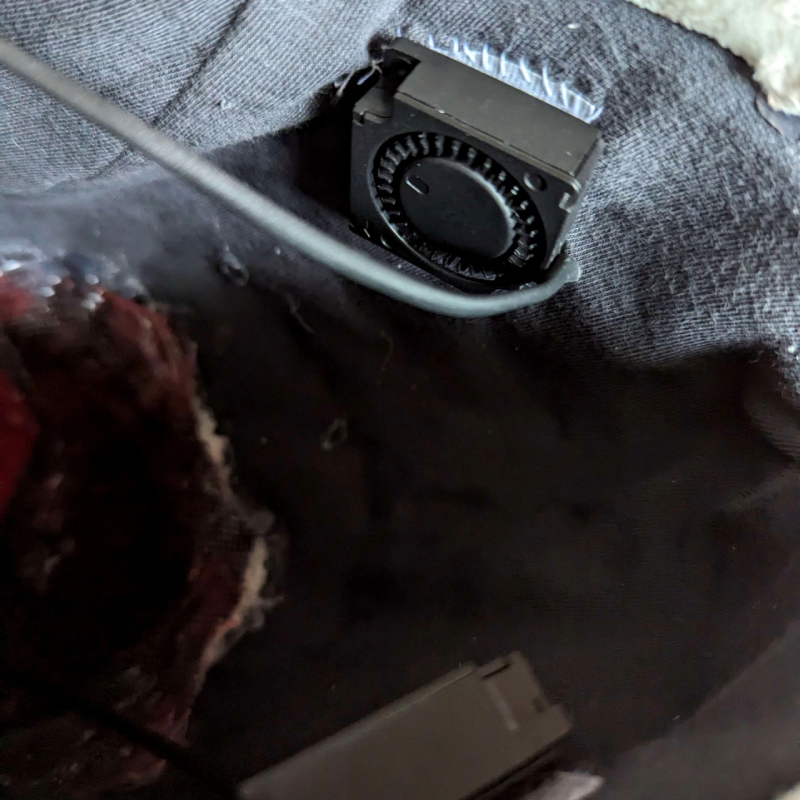
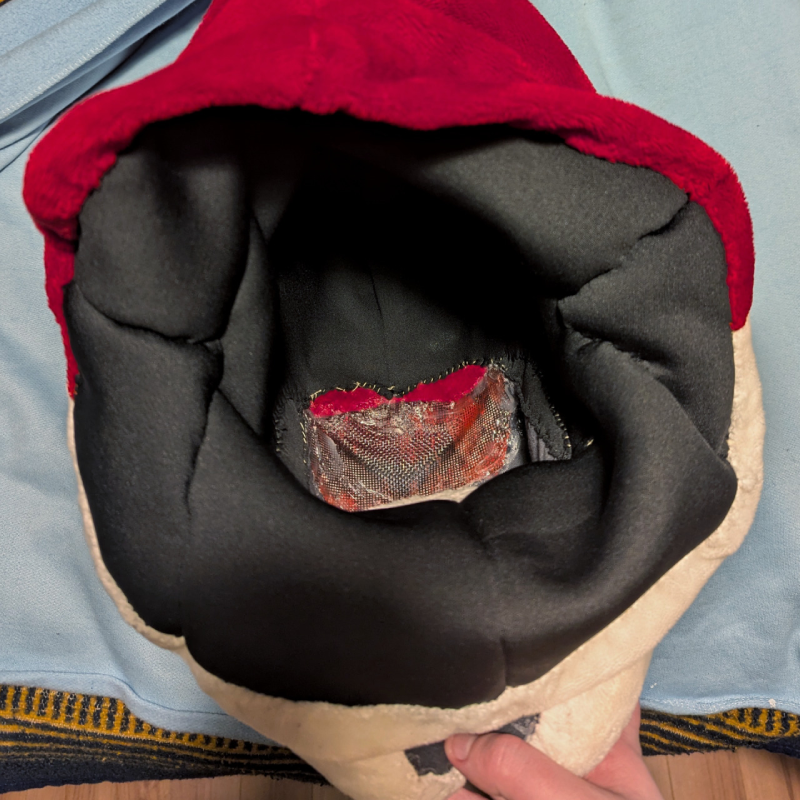
Somewhere in the magical stretch of time between midnight and 5 in the morning, I somehow summoned the inner lining of the head out of french terry knit, a tape pattern and a dream. I also painted a little piece of buckram for the eye mesh to match the red fabric and glued that to the inside of the head. I included a little velcro pocket on the back of the neck to insert a powerbank for the fans (which I then proceeded to procrastinate on installing for a whole 4 months afterwards). Since I’m an idiot and took no pictures signed an NDA with the Midnight Craft Wizard, here’s a picture of the fan installation in the mandibles with velcro so they can be removed to wash it. (Fan kit by Henry’s Helmet Fans)
Once the head was completed, I finally went to sleep. And then I woke up at noon and remembered I forgot the eyes WHOOPS-
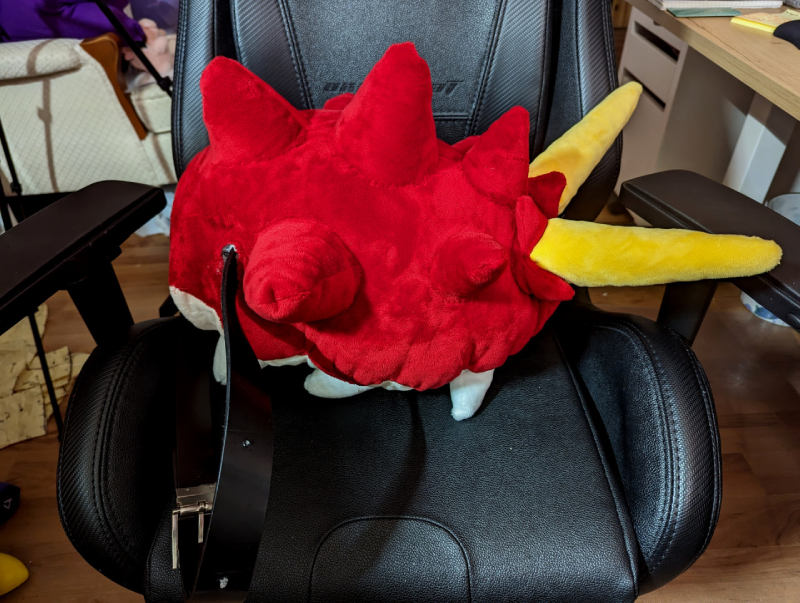
I cut four circles out of high density EVA Foam (Two of them smaller for the pupils), heat shaped a slight curve to them, and covered them with minky. I glued the pupils to the irises and then I glued those suckers to the head and NOW THE HEAD WAS ACTUALLY DONE WOOHOO!
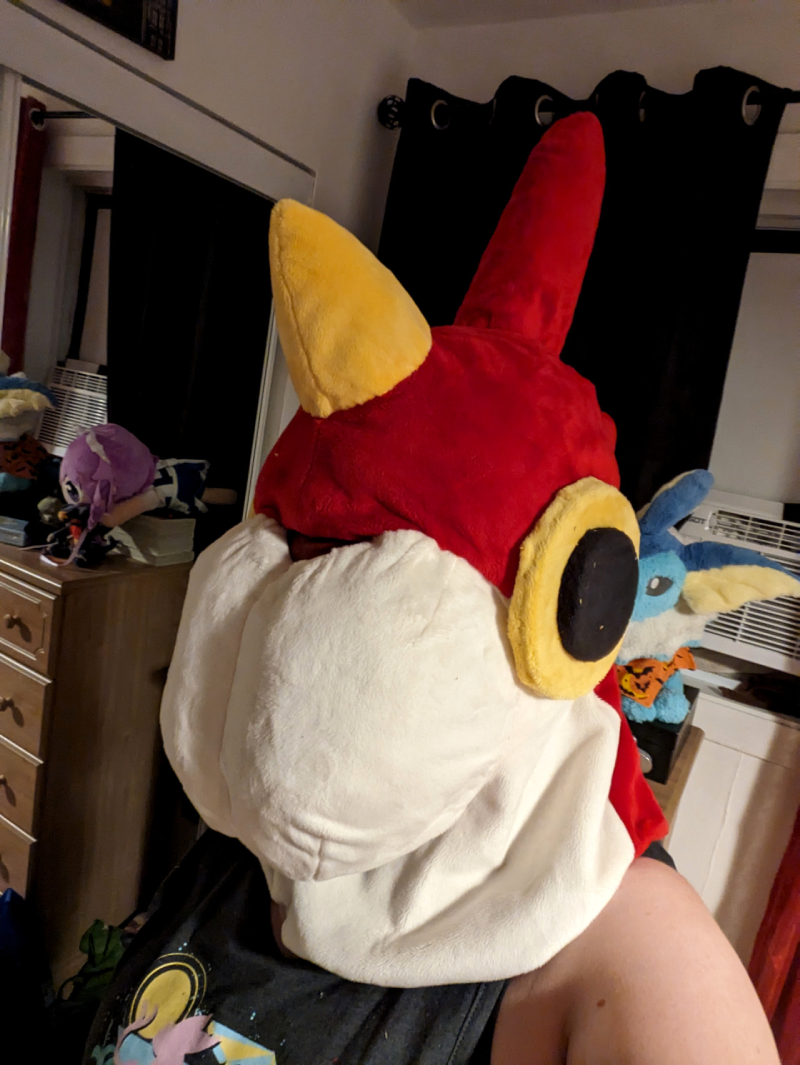
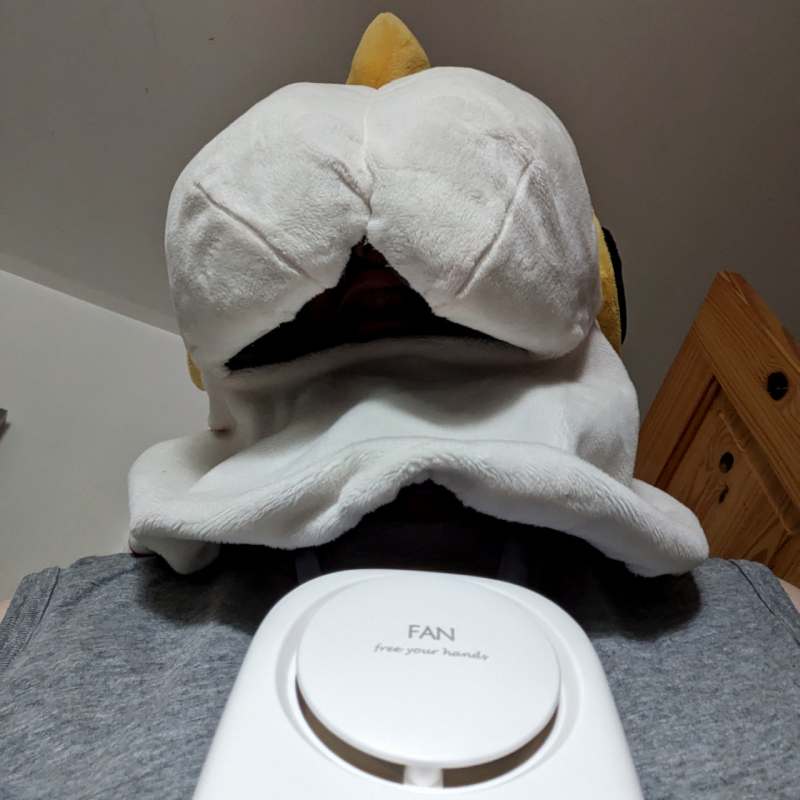
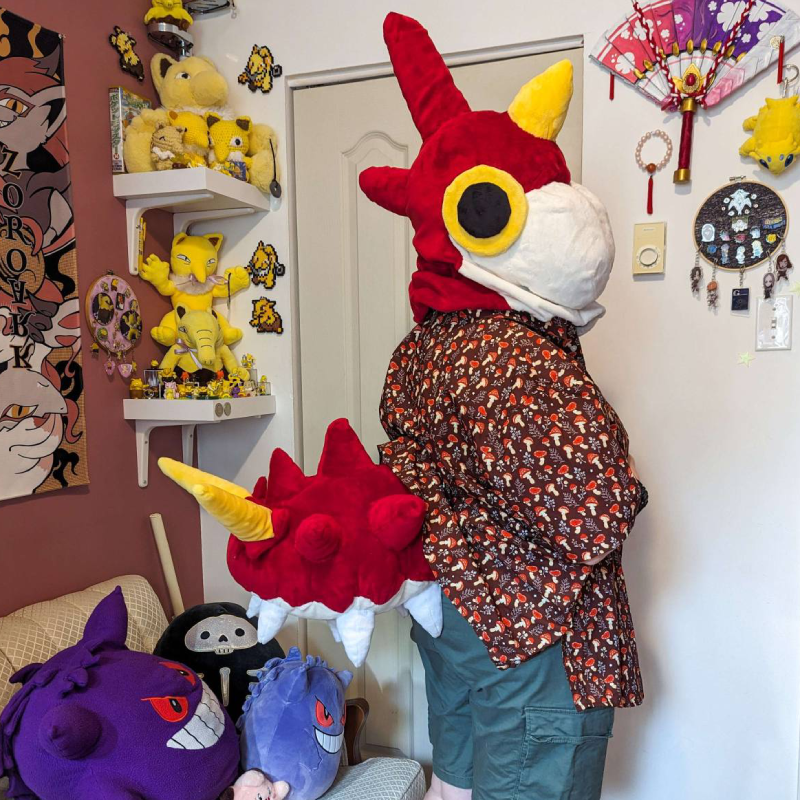
Turns out hiding the vision hole right over the mandibles was… Actually a decent idea, in the end. It blends pretty well into the face at a short distance. The mouth opening also isn’t visible in most angles so I can actually breathe pretty well, and I can even wear a portable necklace fan and have it blow hair into the head without making poor Wurmple eat the fan all the time. I'd say ventilation is better than average over most fursuit heads I've personally tried since!
I took it for a test run at the furmeet and realized the eye vision in the suit was actually pretty damn bad overall because the minky covered half of the original hole up, especially on the sides. I took a heat gun and some scissors to the head so I could peel the minky back around the vision hole, cut some of the upholstery foam out to open the vision hole more, and glued everything back down with a new piece of mesh. Now I have like 40 more degrees in my cone of vision, which puts me on par with some of the soldiers in Metal Gear Solid.

With those adjustments done, the head was finally complete! This was in 2023, though. (The same time this guide was originally written! Time flies.) In 2025 I revisited the head to widen the fit, since the top of the head was so tight it was giving me headaches. I carefully removed the old lining, shaved off parts of the inside of the foam base, then made a new liner out of neoprene. I omitted the battery pocket this time, as I didn't really use the fan system with Wurmple. I glued the lining to the base and sewed the edges cleanly to the neck and the head was ready to be worn once again!
Get Worm'd On
Turns out I like it a whole lot more than I expected. It’s definitively not perfect (what costume ever is?), but it looks leagues better than I thought it would, so it works out. Looking back, I don’t think I’d really do anything else differently on the build's design. Wurmple was a breath of fresh air in a pretty depressing part of my cosplay journey, and he really does represent a new era of how I interact with my costuming hobbies. More silly ideas! Less itchy wigs!
First Event Post-Mortem
I first wore Wurmple to a summer furmeet, on a sunny, windy day.
On the upside, Wurmple is super easy to cram in a bag and go places with. It's lightweight and very breathable when worn. The positioning of the mouth is a huge plus, since I can use a neck fan and just leave it on and the air flow goes directly into the mask, no small fans needed! (In fact, I no other install the mini fans in anymore.)
On the downside, vision is truly terrible in this suit. I've mentionned it at length already, but the viewport is so small my depth perception gets wonky wearing it. That was pretty much the only issue at the furmeet, but a couple more downsides cropped up wearing it to a large convention later on. Due to the awful point of view, I need a handler to drag me around if I want to navigate crowds unless I remove the head. The tail gets in the way of sitting in chairs, so I have to either remove it or turn it to the side of my belt to fit. It's a weird in-between size where it's small enough crowds don't respect the space it takes... But big enough for it to hit everyone in a crowd because... of the space it takes.
All in all, Wurmple is just good fun to wear. The vision puts a large damper on the experience, but it's not enough to discourage me from wearing him; I just have to be a bit picky on which events I take him out to.